fbpx

Ecolet Woocommerce integration

WooCommerce Integration Installation Guide

1. Steps to install the Ecolet WooCommerce integration

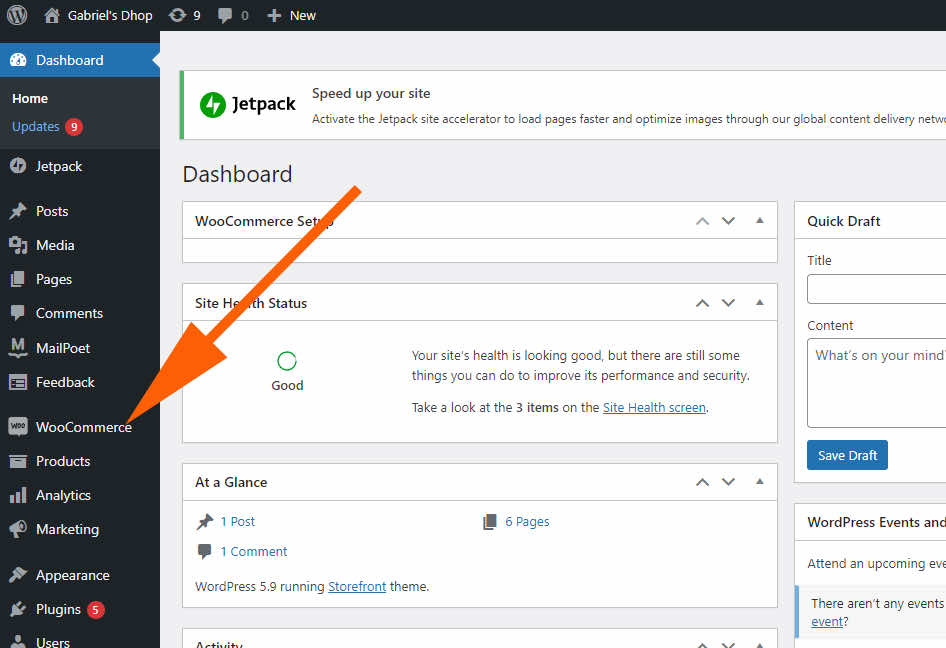
Step 1

Click on “WooCommerce” button

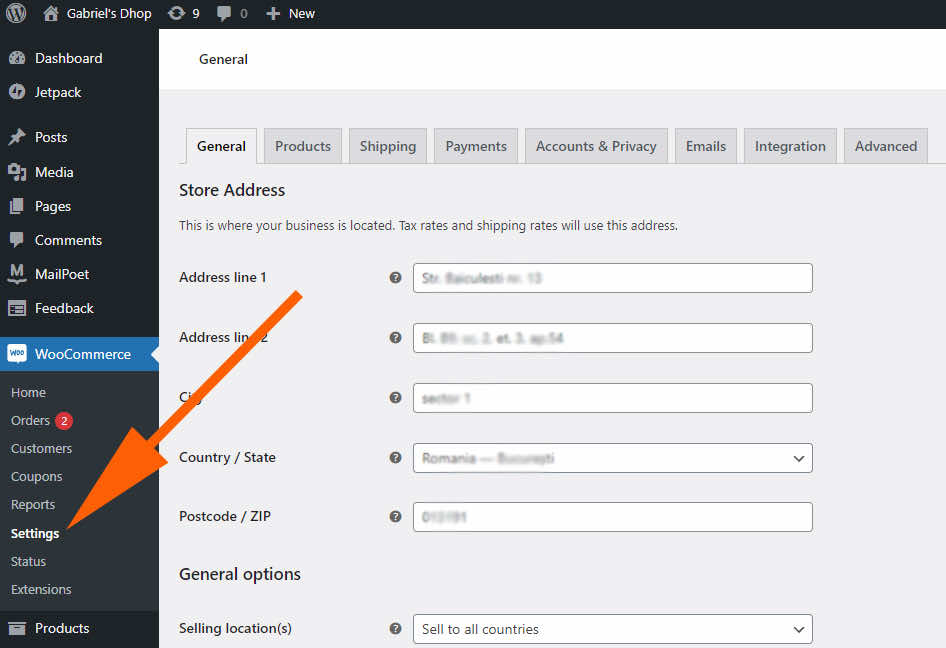
Step 2

Click on the “Settings” button

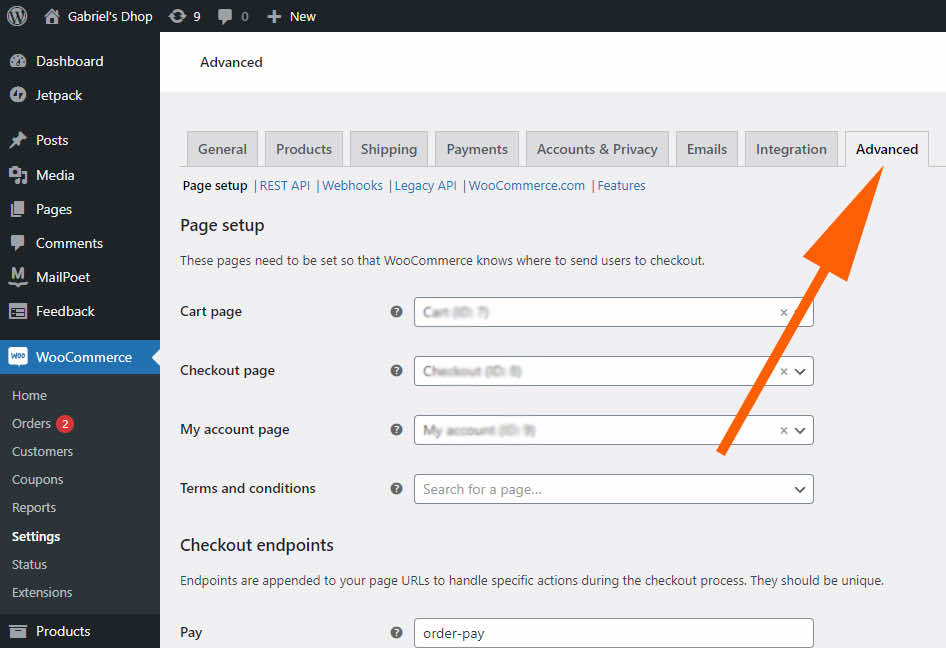
Step 3

Click on the “Advanced” link

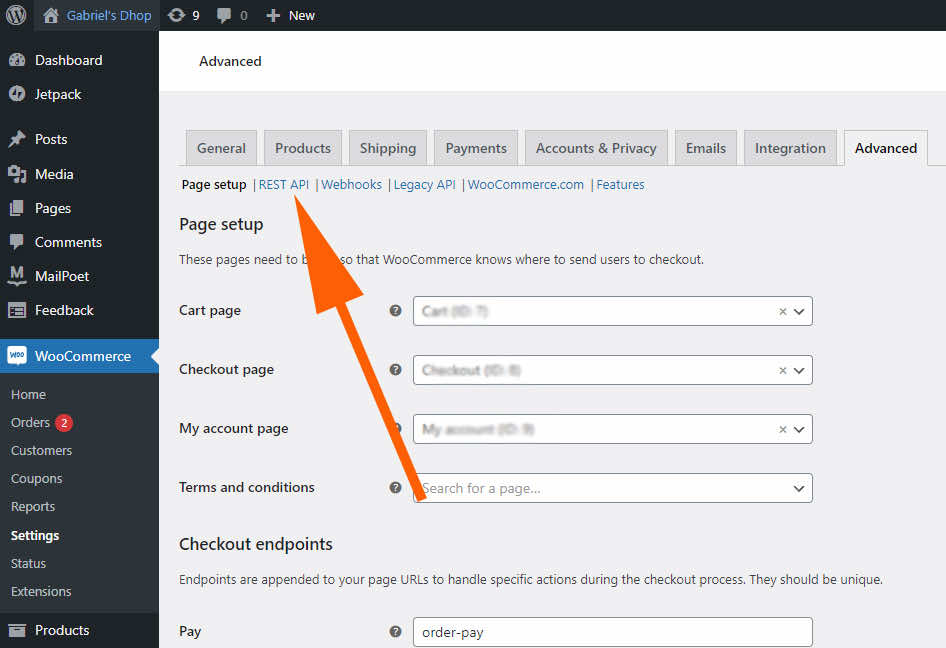
Step 4

Click on “REST API” link

Step 5

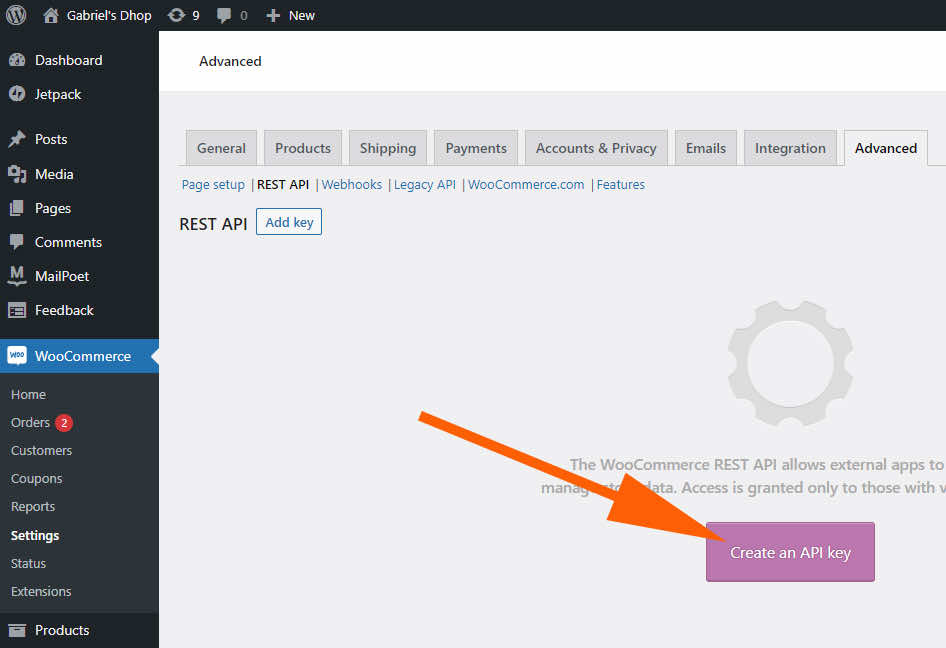
That step can be done if you are using the WordPress administrator level rights.
Click on “Create an API key

Step 6

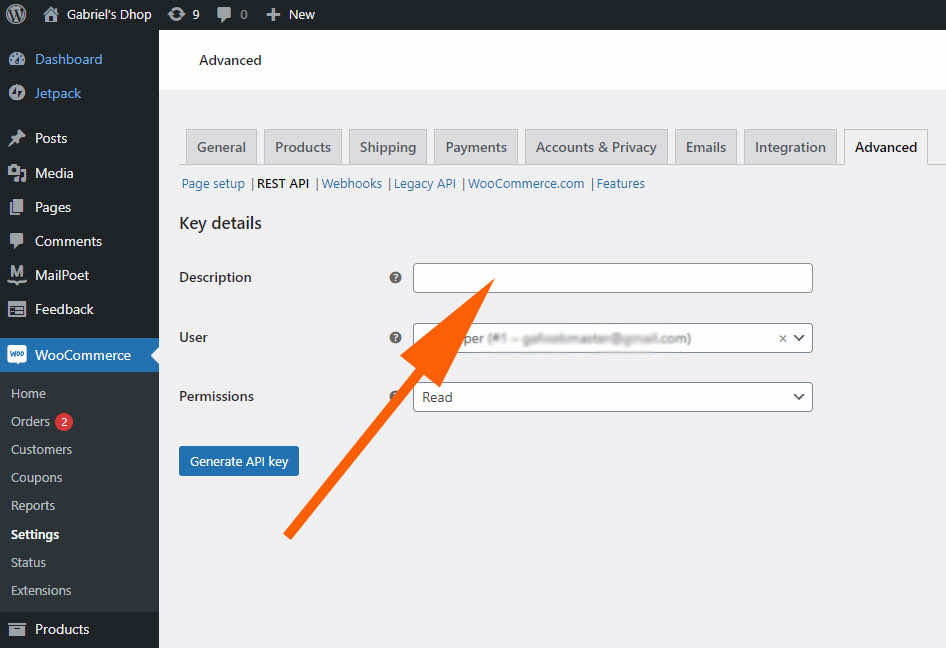
Add any description, like: “Ecolet Integration

Step 7

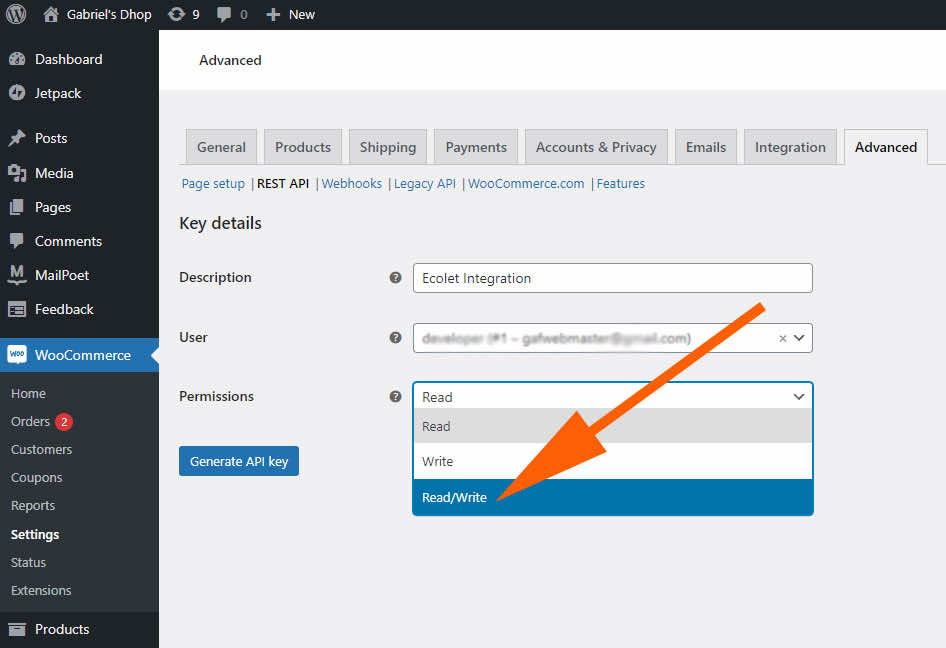
Choose the “Read/Write” option.

Step 8

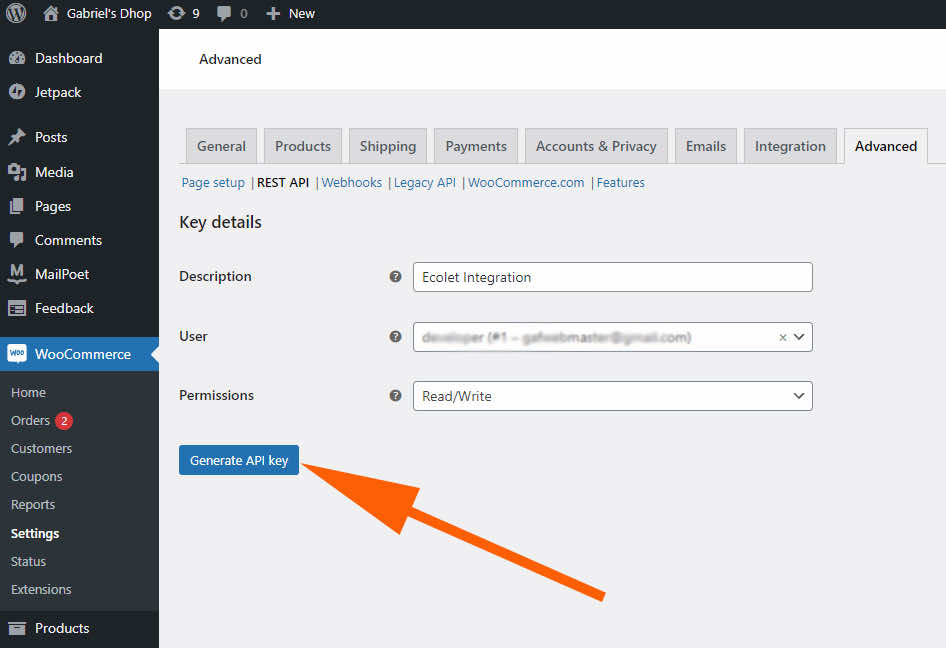
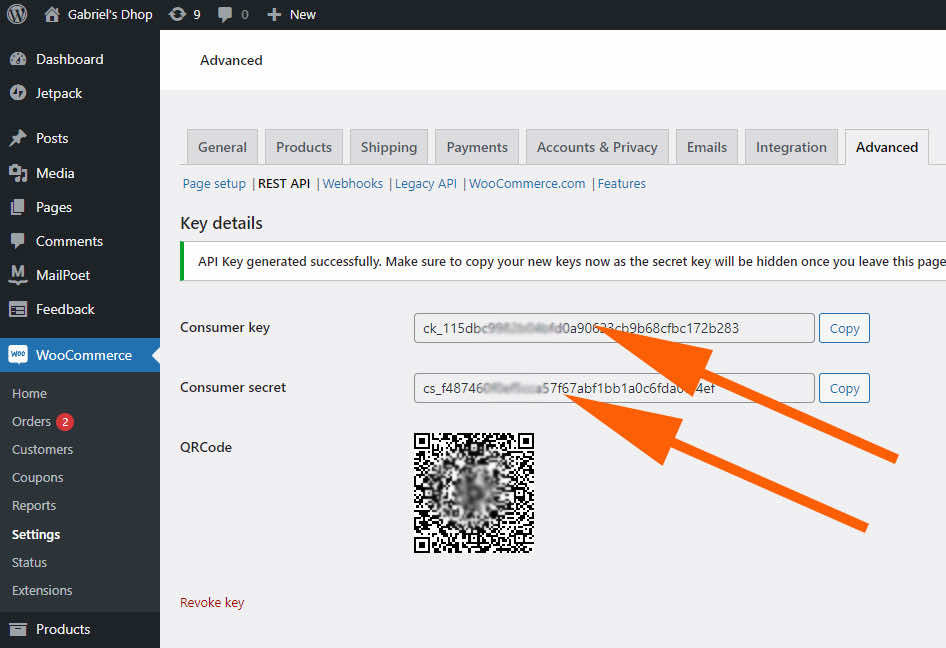
Click on “Generate API key” button.

Step 9

Copy the “Customer key” and the “Customer secret” code because you will need to use later.

Step 10

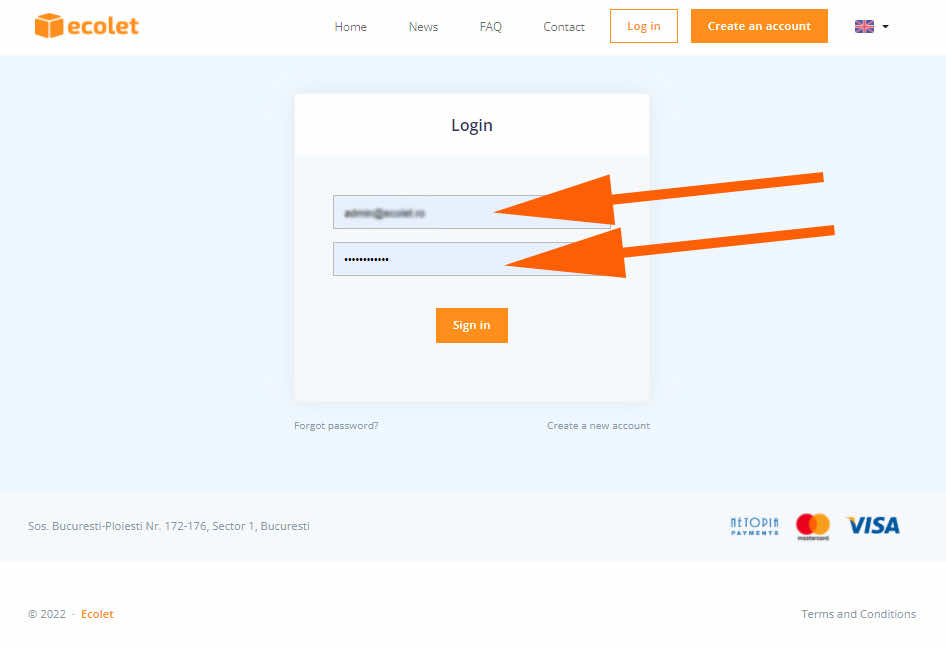
Go the ecolet.ro and click on the “Login” button.

Step 11

Fill your Ecolet “Email” and “Password” details to go to your account.

Step 12

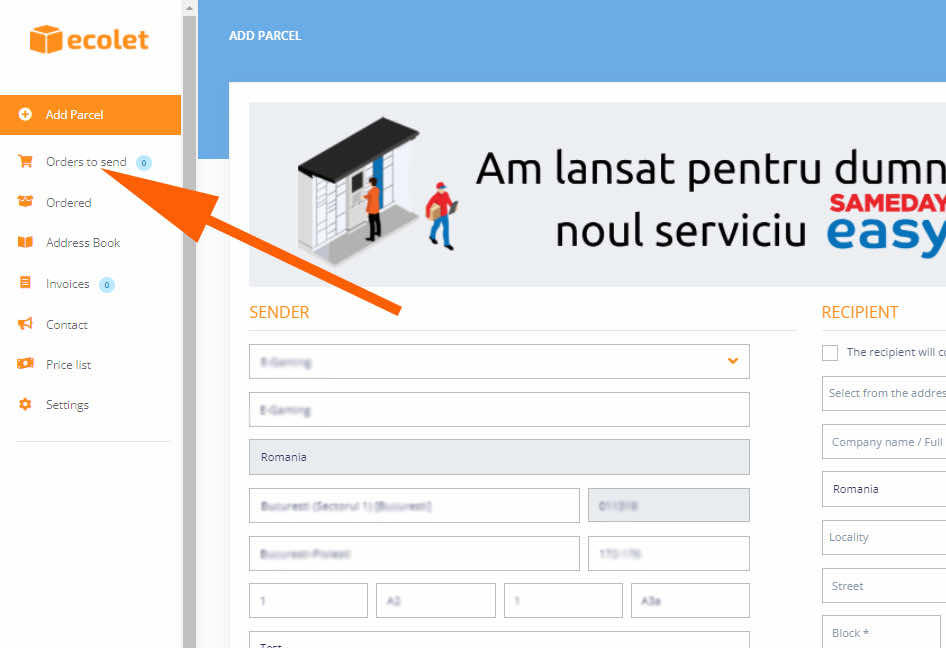
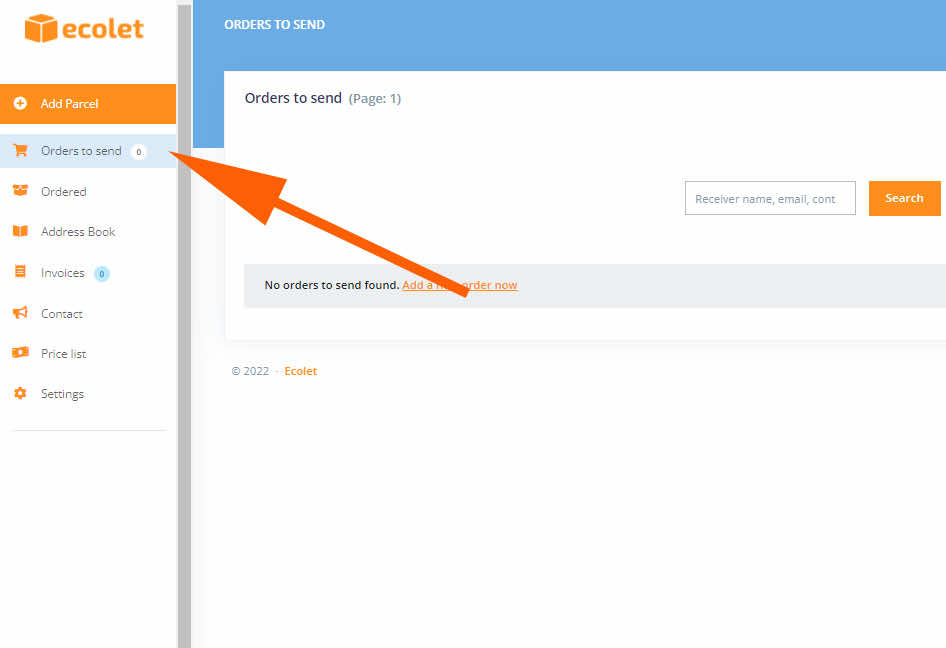
Click on “Orders to send“;

Step 13

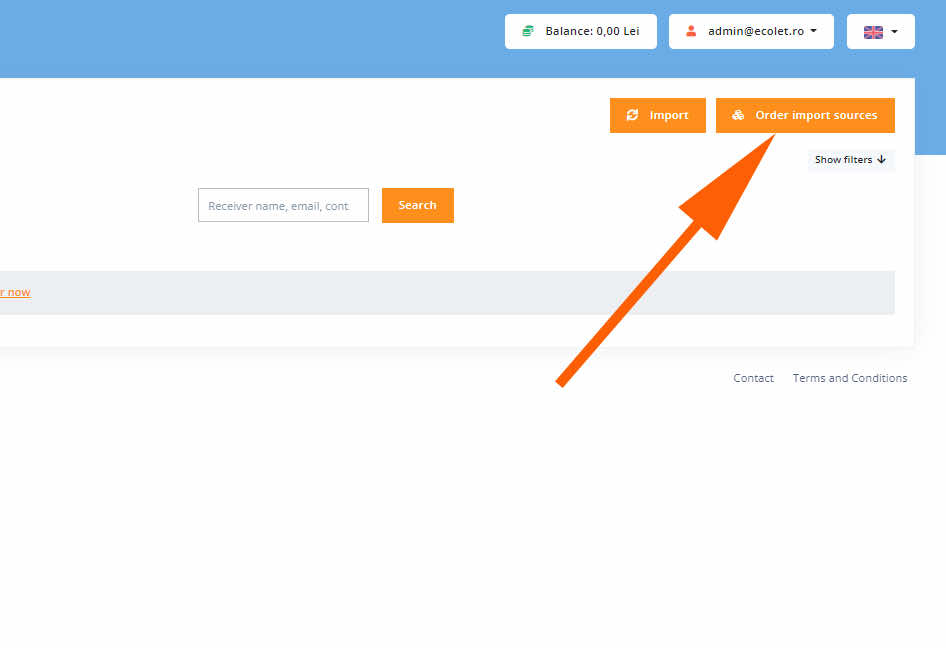
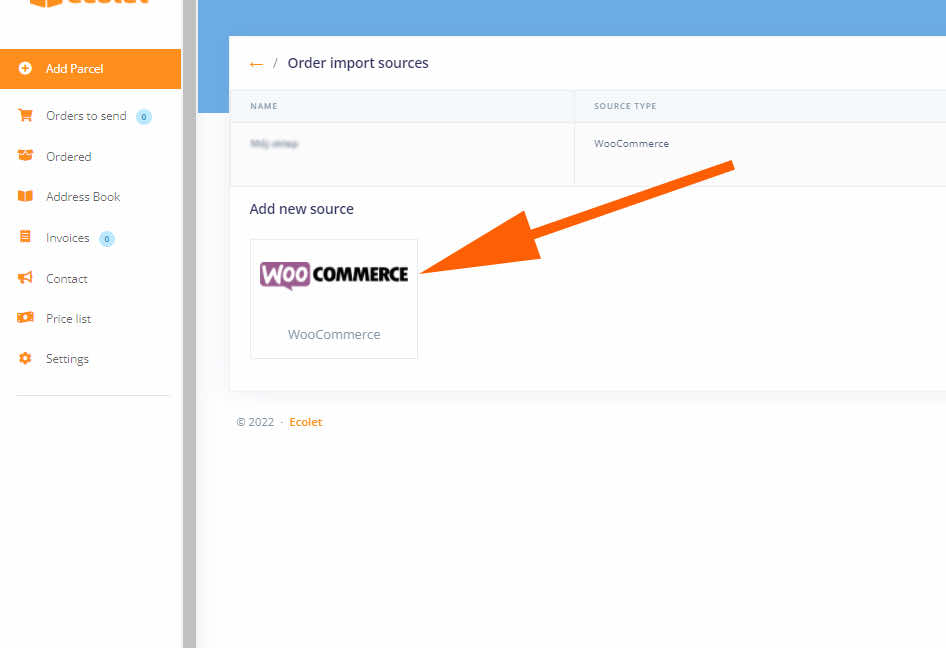
Click on the “Order import sources“.

Step 14

Click on the “WooCommerce” icon;

Step 15

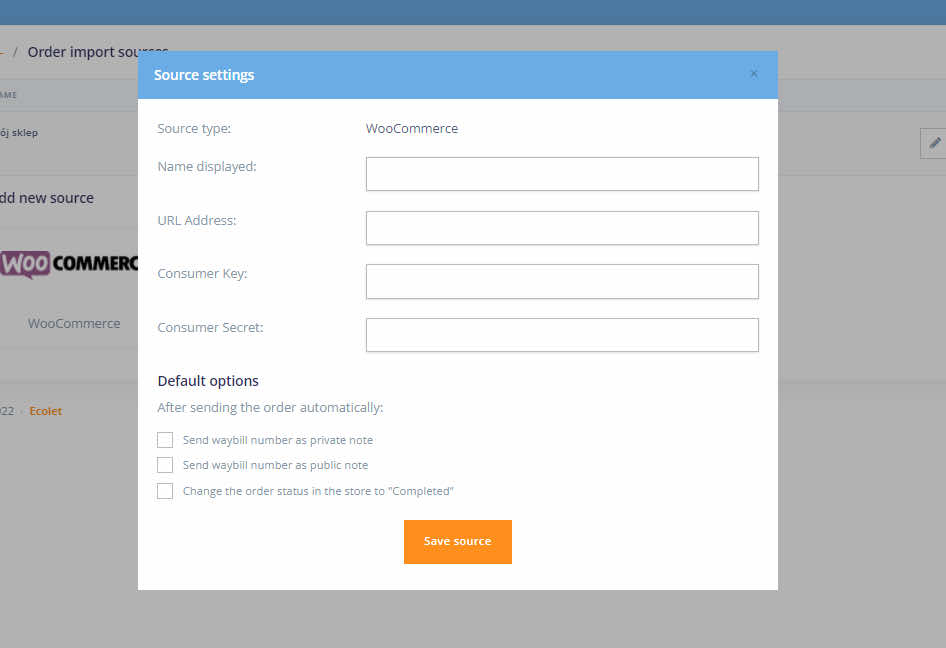
Fill in all the details as you will see in the next picture;

We recommend to thick all that options.

  • By marking the first option you always will receive a private note in your WooCommerce order panel with the AWB number.
  • By marking the second option, your customer will see the AWB number in their private account in your shop and will receive an email with the AWB number. (public note)
  • By marking the last option, every time you finish order in ecolet.ro panel will automatically change the status in your WooCommerce shop to “Complete”. Your customer will receive an email from your shop regarding the change.

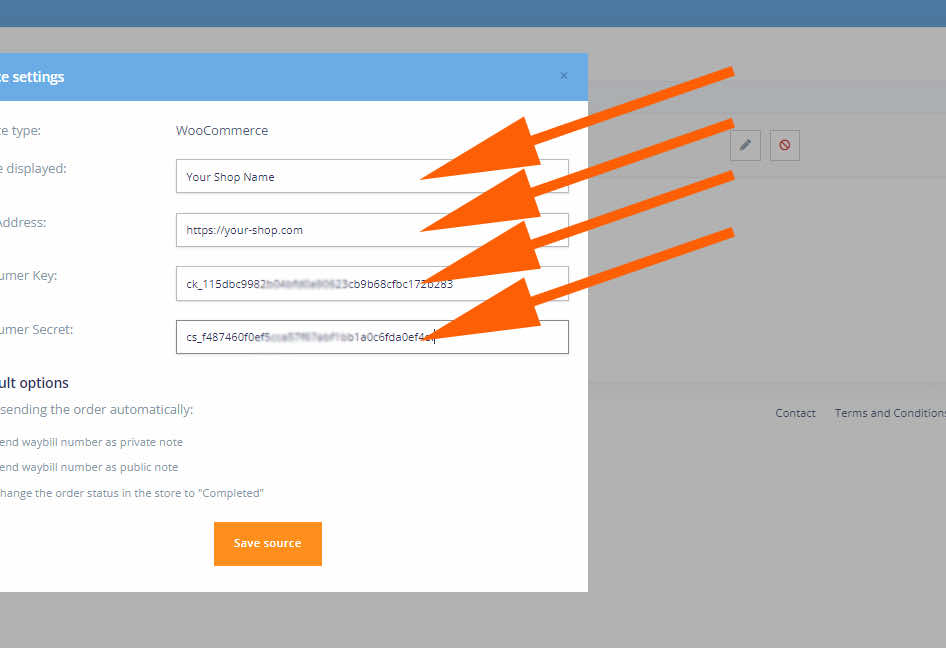
Step 16

On the first field you can write any name;

On the second field your website should follow that pattern:  https://your-shop.com, without the “www”;

Fill in your API key generated on the step before.

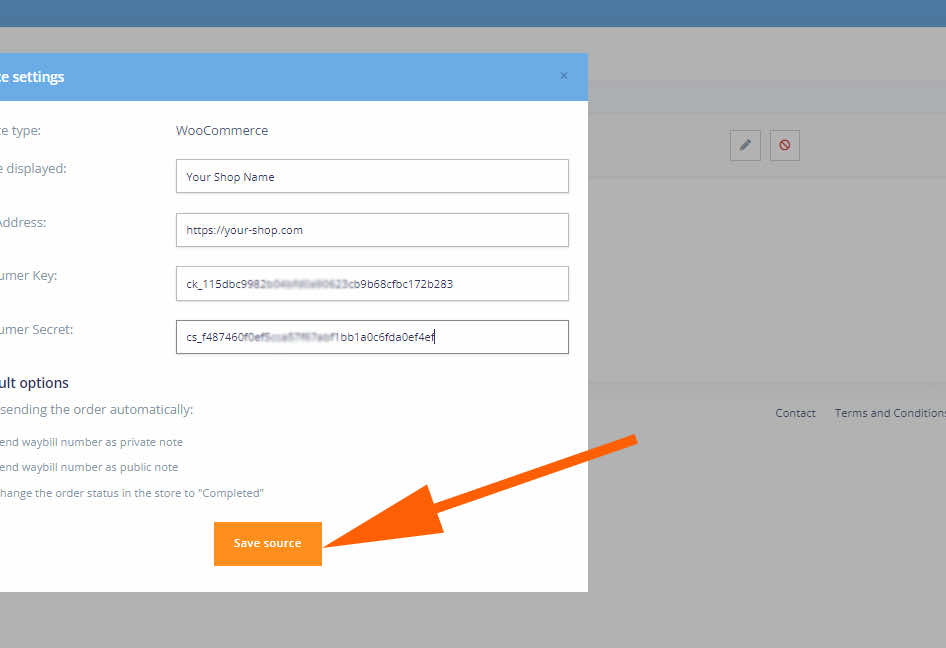
Step 17

Click on the “Save source” button;

2. Steps to import orders from your WordPress to Ecolet platform

Step 1

Click on the “Orders to send” button;

Step 2

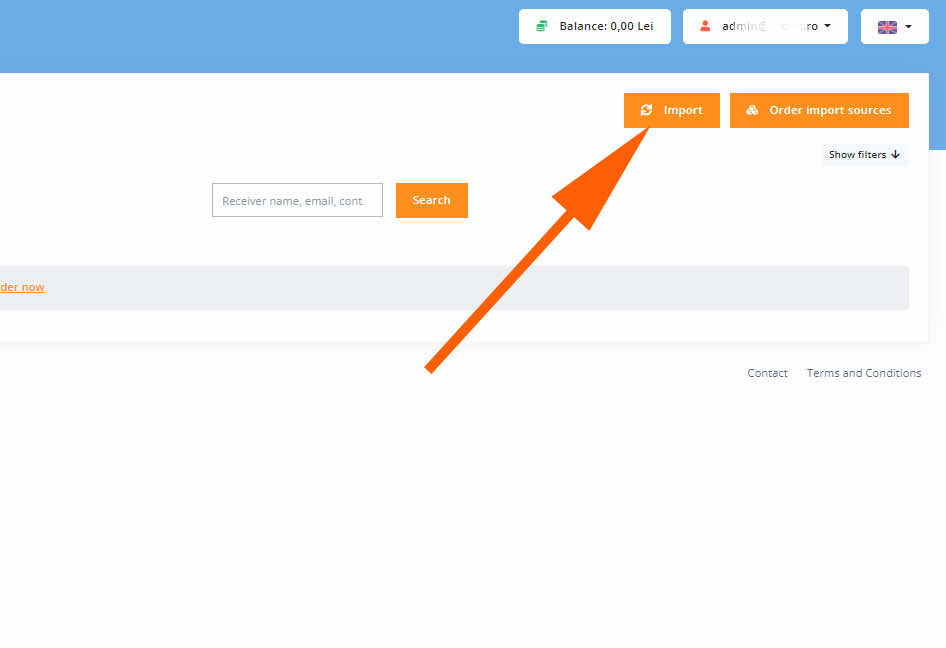
Click on the “Import” button;

Step 3

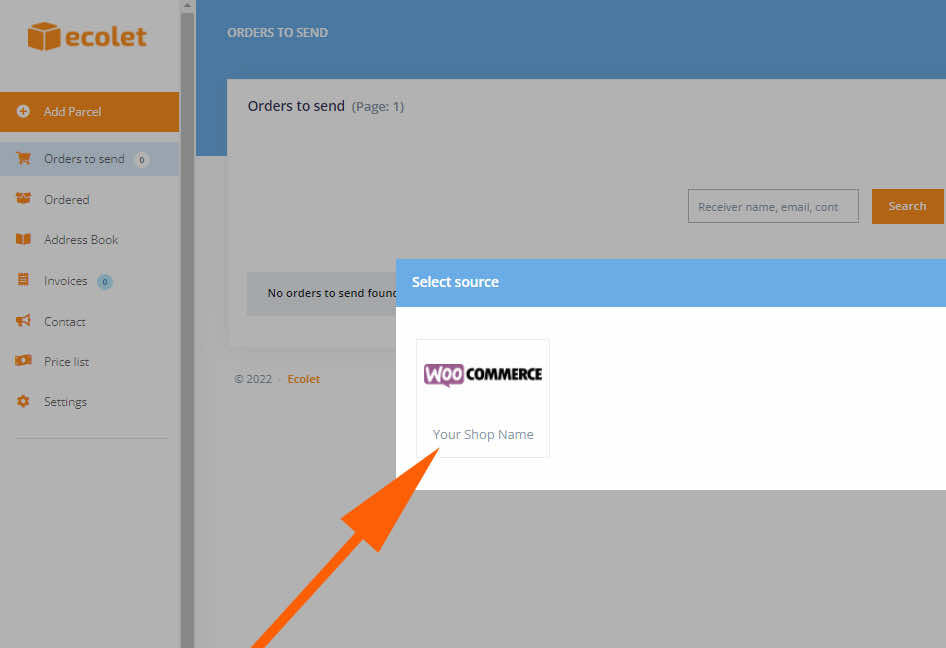
Click on the “WooCommerce” logo;

Step 4

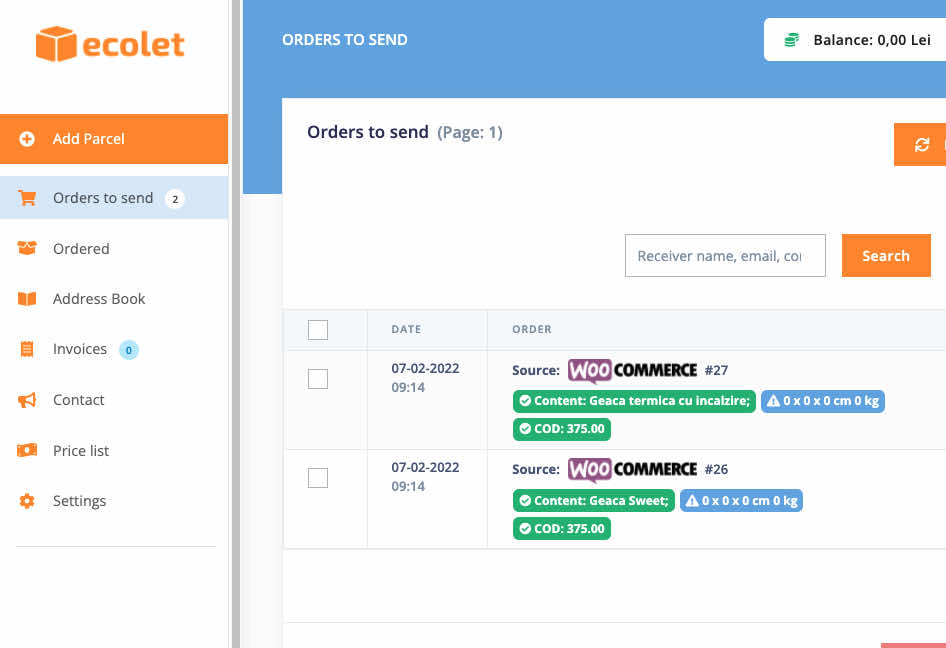
All orders was imported from WooCommerce

Step 5

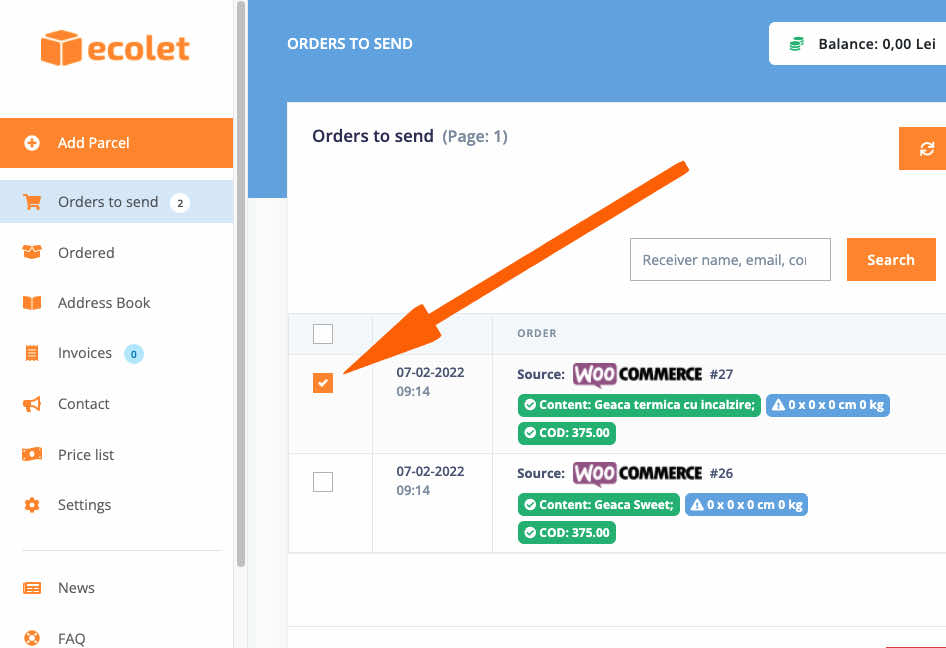
Select the order you want to send;

Step 6

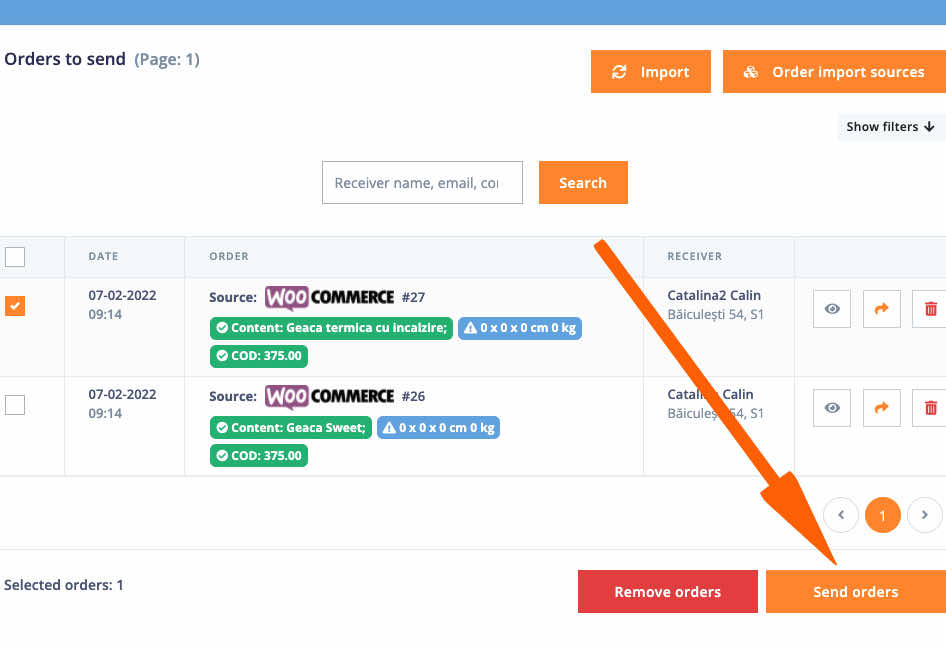
Click on the “Send orders” button;

Step 7

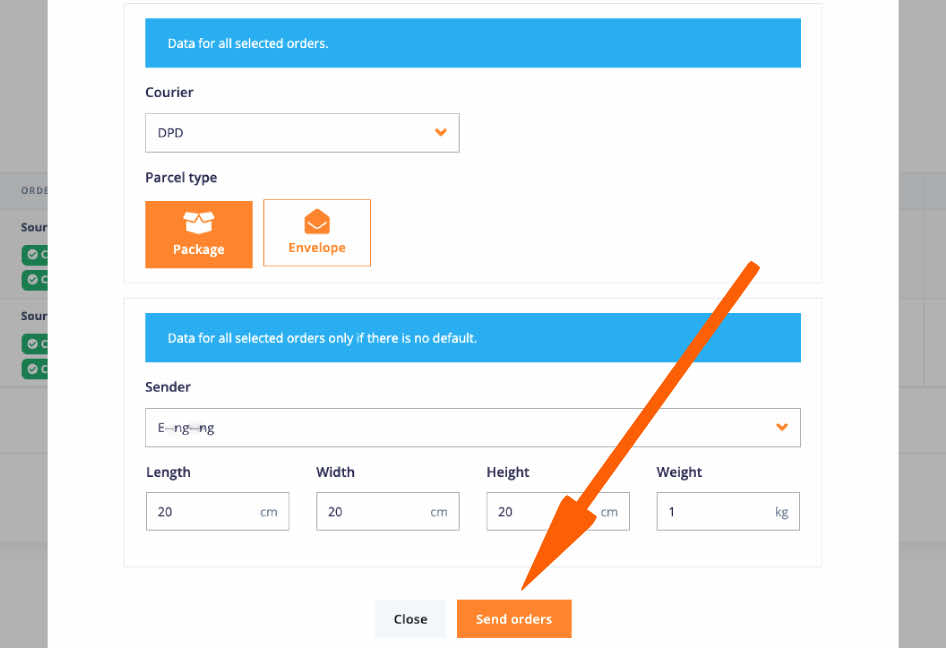
Choose the courier then fill all that details, then send the order.

Step 8

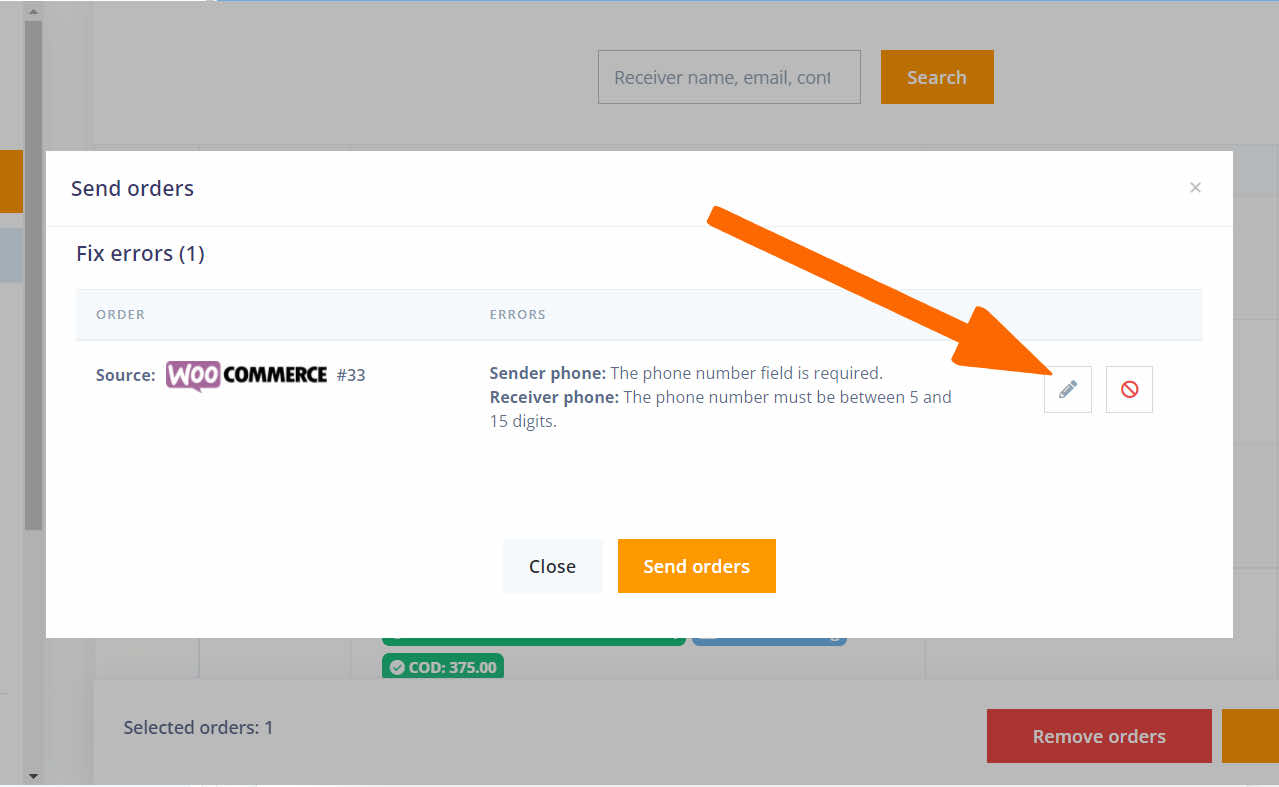
When a customer fills in order details in the wrong place you will need to edit that details to add them in the property input. You will need to click on the Edit button, then edit the details in order to let you send the order.

3. How to edit an imported order

Step 1

If you want to edit any details after you imported the order just click on the arrow sign then you may change the details you need. Then don’t forget to click the button to send or save.

Step 2

Edit all the details you would like then click on “Save to send

4. Does the integration not working?

Reasons that can affect the plugin functionality

  • If you have on your WordPress more plugins for importing orders it will be a conflict and will not working any of them. So, is necessary to check that.
  • Be sure that you filled right information.